My Blog

e-Visa

travel visa for sri lanka
Visas, e-Visa, Obtaining a Visa, Sri Lanka

Do you need a travel visa for Sri Lanka

If you’re planning a trip to the beautiful island nation of Sri Lanka, it’s important to understand the visa requirements before you go. All foreign nationals traveling to visit Sri Lanka for any purpose other than a Short Visit need to obtain necessary visas before their arrival. Whether you’re traveling for tourism, business, work, or education, knowing the right visa type is key to ensuring a smooth journey. In this article, we’ll walk you through everything you need to know about the travel visa for Sri Lanka, including who needs it, how to apply, and some tips to make the process easier. Who Needs a Travel Visa for Sri Lanka? When it comes to entering Sri Lanka, most travelers will need to apply for a travel visa for Sri Lanka. There are two main ways travelers usually enter: Electronic Travel Authorization (ETA): Most tourists can simply apply for an ETA online before traveling. Visa from the Embassy: Those visiting for work, study, or long stays must get a full visa from the Sri Lankan embassy or consulate. If you are visiting for a short stay, tourism, business meetings, or transit, an ETA is usually enough. But if you plan to stay longer or for reasons like employment or education, you must apply for the appropriate visa before arriving. What is the Electronic Travel Authorization (ETA)? The Electronic Travel Authorization (ETA) is the easiest way for tourists and short-term business visitors to enter Sri Lanka. It’s an online system where you can quickly get permission to travel without visiting an embassy. The ETA typically allows: Tourists are allowed to stay up to 30 days (with the option to extend once). Business travelers to attend meetings, conferences, or short training sessions. Transit passengers are allowed to stay up to 2 days while waiting for a connecting flight. You can apply for the ETA online through official websites or trusted visa agencies like Fluxir, who make the process even faster and simpler. How to Apply for a Travel Visa for Sri Lanka? Applying for a travel visa for Sri Lanka is straightforward if you follow these steps: Determine the Right Visa Type: Know if you need an ETA or a full visa based on your purpose of travel. Gather Your Documents: Make sure you have a valid passport (with at least 6 months’ validity), a passport-sized photo, flight details, and proof of accommodation. Apply Online or at the Embassy: For short visits, apply for an ETA through trusted services. For long stays or specific purposes (work, study), contact the nearest Sri Lankan embassy. Pay the Fees: Fees vary depending on the visa type and your nationality. Wait for Approval: ETA approvals usually arrive within a few hours to a few days. Embassy visa approvals may take longer. At Fluxir, we handle the entire process for you, ensuring everything is correct and saving you the hassle of dealing with paperwork. How Long Can You Stay in Sri Lanka with a Travel Visa? With a standard travel visa for Sri Lanka, your allowed stay depends on the visa type, as follows: ETA for Tourism: 30 days, extendable for another 30 days. ETA for Business: 30 days, single or multiple entries depending on the purpose. Embassy Visa for Work, Study, or Long Stay: Validity depends on the specific category and can range from 3 months to several years. It’s important to respect your visa’s validity period and apply for extensions early if you plan to stay longer. Can You Extend Your Stay in Sri Lanka? Yes, it is possible to extend your travel visa for Sri Lanka, especially if you entered with a tourist or business ETA. Extensions are usually granted by visiting the Department of Immigration and Emigration in Colombo, Sri Lanka. To apply for an extension, you will need: Your original passport. Proof of sufficient funds. Valid reasons for extension (such as tourism or business activities). You can also use professional services like Fluxir to handle the extension process easily while you enjoy your time in Sri Lanka. Common Reasons for Visa Rejections Although getting a travel visa for Sri Lanka is relatively easy, there are still some reasons why applications may be rejected: Incomplete application forms. Insufficient documentation. Criminal records. Past immigration violations. To avoid any issues, always double-check your documents and, when possible, use trusted visa assistance like Fluxir to ensure your application is complete and accurate. Tips for a Smooth Visa Application Process Here are some tips to make sure your travel visa for Sri Lanka application goes smoothly: Apply Early: Don’t wait until the last minute. Apply at least 2-3 weeks before your planned travel date. Use Accurate Information: Make sure the details you enter match your passport exactly. Keep Copies: Save copies of your ETA approval or visa in both digital and paper formats. Check Entry Requirements: Some travelers may need to show proof of onward travel and sufficient funds at immigration. By following these simple steps, you can avoid delays and enjoy a stress-free journey to Sri Lanka. Start Your Sri Lanka Adventure with Fluxir — Apply for Your Travel Visa Today! Ready to explore the beautiful beaches, rich culture, and vibrant cities of Sri Lanka? At Fluxir, we make the travel visa application process for Sri Lanka simple, fast, and secure. Let us handle the paperwork while you focus on planning your dream trip. Visit Fluxir today and take the first step toward your unforgettable Sri Lankan adventure.  

golden visa in indonesia
e-Visa, Indonesian, Obtaining a Visa, Visas

What is a Golden Visa in Indonesia?

The golden visa in Indonesia is an exciting new opportunity for travelers, investors, and professionals looking to make Indonesia their second home. The “Indonesian Golden Visa” is an immigration facilitation program that allows foreigners to enter and stay in Indonesia for 5 (five) or 10 (ten) years, designed to support the national economy. It is a major step taken by the Indonesian government to attract international talent, investors, and skilled individuals who can contribute positively to the country’s growth. In this article, we will explain everything you need to know about the Indonesian golden visa, including who qualifies, how to apply, and why now is the perfect time to consider this opportunity. What is the Golden Visa Program in Indonesia? The golden visa in Indonesia is a special type of long-term residence visa that gives foreigners the right to live, work, invest, or conduct business activities in Indonesia for an extended period without constantly needing to renew their visa. Unlike typical visas that are valid for short periods, the Golden Visa allows holders to stay for either 5 or 10 years, depending on their category and investment level. This move places Indonesia among other countries like Portugal, the UAE, and Spain that offer golden visas to attract global investors and talents. The goal is clear: to boost the economy by encouraging foreign direct investments, creating jobs, and introducing more innovation to Indonesia. Who Can Apply for a Golden Visa in Indonesia? The golden visa in Indonesia is available for different types of applicants, including: Individual Investors: Those who make significant financial investments in Indonesian companies, start businesses, or invest in the local economy. Talented Individuals: Professionals with exceptional skills in technology, science, arts, or other valuable sectors. Entrepreneurs and Start-up Owners: Foreigners who wish to establish and run businesses that contribute to Indonesia’s economy. Senior Executives: High-ranking managers and directors of international companies planning to expand into Indonesia. Each category has specific requirements, but all aim to attract individuals who can make a positive impact on the country. How Long is the Golden Visa Valid? There are two options for the Indonesian golden visa: 5-Year Golden Visa: Typically granted to those who meet the minimum investment or contribution requirements. 10-Year Golden Visa: Reserved for individuals making larger investments or showing greater commitments to Indonesia. The longer validity period means less paperwork, fewer renewals, and more stability for those looking to build a long-term future in Indonesia. What are the Benefits of the Golden Visa in Indonesia? Choosing the Indonesian golden visa comes with many advantages, such as: Long-Term Residency: No need for frequent visa renewals or constant travel back and forth. Flexibility: Golden Visa holders can live, work, or invest freely across Indonesia. Family Inclusion: You can include your spouse and children in your application. Business Opportunities: Easier access to setting up companies, investing, and expanding your professional activities. Pathway to Citizenship: Although not automatic, holding a Golden Visa may open doors for permanent residency and even citizenship over time. Indonesia is quickly becoming a hotspot for digital nomads, entrepreneurs, and investors. With the Golden Visa, the doors are wide open for you to be a part of its bright future. How to Apply for a Golden Visa in Indonesia? Applying for the golden visa in Indonesia involves a few important steps: Prepare Your Documents: Gather your passport, investment documents, proof of financial stability, and professional qualifications if necessary. Choose the Right Visa Length: Decide whether you qualify for a 5-year or 10-year visa based on your investment or contribution. Work with a Trusted Partner: It’s highly recommended to use a professional service like Fluxir to make sure your application is complete, accurate, and processed quickly. Submit Your Application: File your application through the proper immigration channels. Wait for Approval: Processing times may vary, but working with experts can significantly speed up the process. At Fluxir, we specialize in handling visa applications, including the prestigious Golden Visa. We make the process easy and hassle-free. Why Now is the Best Time to Apply? Indonesia’s economy is growing fast, offering new opportunities for business, investment, and personal development. The Indonesian golden visa program is relatively new, meaning early applicants can enjoy smoother processing and take full advantage of new incentives introduced by the government. If you have been dreaming of living in a tropical paradise with booming business opportunities and a vibrant culture, now is the time to make your move. Secure Your Future with Fluxir — Apply for Your Indonesian Golden Visa Today If you’re ready to start a new chapter and take advantage of the incredible opportunities Indonesia offers, Fluxir is here to help you every step of the way. Our team of experts makes the process of securing your golden visa in Indonesia simple, fast, and stress-free. Visit Fluxir today and let’s get your Indonesian journey started the right way.

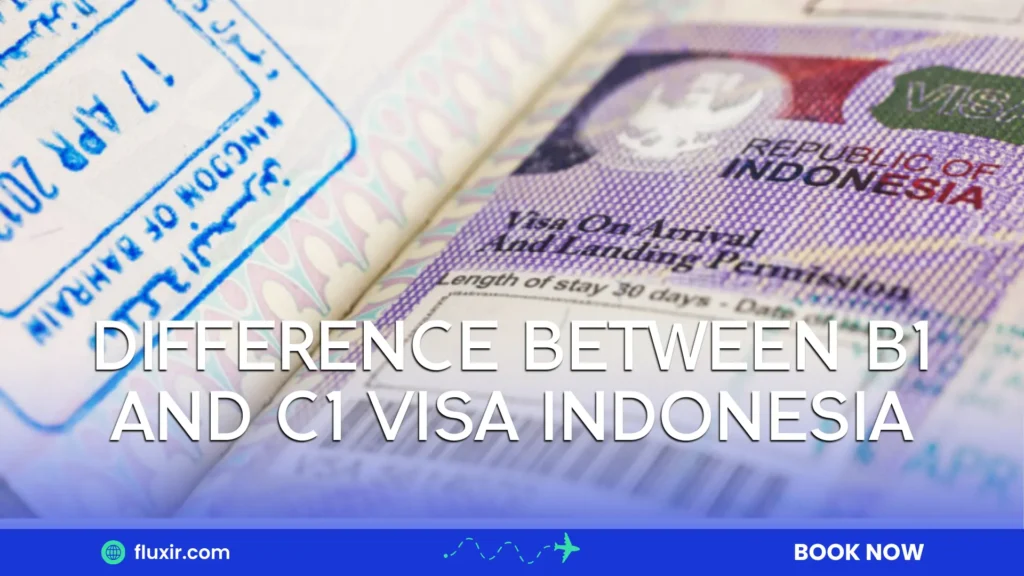
difference between b1 and c1 visa indonesia
e-Visa, Obtaining a Visa, Visas

What is the Difference Between B1 and C1 Visa Indonesia?

If you’re planning a trip to Indonesia, you might have come across different visa types and felt a little confused. One common question travelers ask is: what is the difference between B1 and C1 visa Indonesia? It’s important to understand these differences to make sure you choose the right visa for your trip. Travelers who can get a B1 Tourist Visa (30 days) (Visa on Arrival) can extend it once for another 30 days (online or with the help of an agent). Travelers can (and sometimes must) apply directly for a C1 (211A) Visit Visa (60 days) before arrival. At Fluxir, we can help you arrange this visa quickly and easily. In this article, we’ll explain everything you need to know about the difference between B1 and C1 visa Indonesia so you can travel with confidence. Understanding the B1 Tourist Visa (Visa on Arrival) The B1 Tourist Visa is the most common choice for short-term visitors who plan to stay in Indonesia for tourism, leisure, or visiting friends and family. Here’s what you should know about the B1 Visa: Visa on Arrival: The B1 visa is typically issued when you land at an Indonesian airport or seaport. Validity: It is valid for 30 days starting from your arrival date. Extension: You can extend it once for another 30 days, giving you a maximum stay of 60 days without leaving the country. Application: No need to apply before you travel. Simply pay the visa fee when you arrive. Purpose: Strictly for tourism. It does not allow you to work, study, or conduct any business activities. The B1 Tourist Visa is perfect if you’re planning a simple holiday or a short visit. However, if you think you might stay longer or have other activities planned, the C1 Visa could be a better choice. What is the C1 (211A) Visit Visa? The C1, officially known as the 211A Visit Visa, is designed for travelers who want to stay in Indonesia for a longer period or for purposes beyond just tourism. Here are the key features of the C1 Visa: Pre-Application: You must apply for the C1 Visa before you arrive in Indonesia. Validity: It allows you to stay for 60 days initially. Extension: You can extend the C1 Visa multiple times, depending on your specific needs and visa type. Purpose: While it covers tourism, it also allows for social visits (like visiting family), business meetings, cultural activities, and humanitarian work. Application Process: You will need a sponsor letter in Indonesia (for example, from a hotel, a local travel agent like Fluxir, or an individual). Approval Time: Processing the C1 Visa typically takes about 7 to 10 working days. For travelers planning longer stays or different types of visits, the C1 Visa offers greater flexibility compared to the B1 Visa. Main Difference Between B1 and C1 Visa Indonesia Understanding the difference between B1 and C1 visa Indonesia is crucial to planning your travel correctly. Here’s a simple breakdown: How to Apply: B1 Tourist Visa: You can get it on arrival at the airport or seaport in Indonesia. C1 (211A) Visit Visa: You must apply for it before traveling to Indonesia. Initial Stay Duration: B1 Tourist Visa: Valid for 30 days from your arrival date. C1 (211A) Visit Visa: Allows you to stay for 60 days initially. Extension Possibility: B1 Tourist Visa: Can be extended once for an extra 30 days. C1 (211A) Visit Visa: Can be extended multiple times depending on your needs. Purpose of Visit: B1 Tourist Visa: Only for tourism and leisure. C1 (211A) Visit Visa: Suitable for tourism, visiting family, attending business meetings, humanitarian work, and cultural activities. Sponsor Requirement: B1 Tourist Visa: No sponsor is needed. C1 (211A) Visit Visa: Requires a sponsor in Indonesia (a hotel, travel agency, or an individual). Application Support: B1 Tourist Visa: Generally, you don’t need any assistance. C1 (211A) Visit Visa: It is recommended to use professional help, and Fluxir can assist you in handling all the paperwork smoothly. In short, to understand the difference between b1 and c1 visa indonesia,  if you’re only staying for a short vacation, the B1 Visa is probably enough. But if you need flexibility, longer stays, or have other activities planned, the C1 Visa is the safer and smarter option. Which Visa Should You Choose? After illustrating the difference between b1 and c1 visa indonesia, choosing between the B1 and C1 visa depends on your travel plans and how long you want to stay in Indonesia. Choose a B1 Visa if you are visiting for up to 30 days and your plans are straightforward. Choose C1 Visa if you plan to stay longer, extend your stay, visit family, attend business meetings, or participate in cultural events. Remember, applying for the right visa ahead of time will save you from unnecessary stress during your trip. With Fluxir, applying for a C1 Visa is quick, easy, and fully supported every step of the way. How Fluxir Can Help You with Your Indonesian Visa Navigating the difference between B1 and C1 visa Indonesia might seem complicated, but with Fluxir, it doesn’t have to be. Our experienced team can: Help you apply for the right visa Guide you through the paperwork Speed up the approval process Assist with visa extensions if needed We know how important it is to get everything right before you travel. That’s why we are dedicated to making your visa application experience stress-free and efficient. Ready to Travel? Apply for Your Indonesia Visa with Fluxir Today! At Fluxir, we make it simple to understand the difference between B1 and C1 visa Indonesia and choose the one that’s right for you. Whether you need a Visa on Arrival or a C1 Visit Visa, we handle all the details so you can focus on enjoying your trip. Reach out to Fluxir now and let’s start planning your smooth journey to Indonesia today.

indonesia visa regulations
e-Visa, Indonesian, Obtaining a Visa, Visas

Indonesia Visa Regulations: What You Need to Know for 2025

  If you’re planning a trip to Indonesia soon, it’s important to stay updated on the latest Indonesia visa regulations. Indonesia has always been a top travel destination thanks to its beautiful islands, rich culture, and welcoming people. But before you pack your bags, knowing the latest visa policies and travel rules is essential to ensure your trip goes smoothly. At Fluxir, we are here to help you navigate the ever-changing Indonesia visa regulations easily and confidently, and in this guide, we will walk you through the updated rules for 2025, how to extend your visa while in Indonesia, and which nationalities need a visa to enter. What Are the Latest Indonesia Visa Rules for 2025? As of 2025, Indonesia has introduced some updates to its visa policies to make travel more convenient and organized for visitors. The latest Indonesia visa regulations focus on enhancing the visitor experience while maintaining security and order at entry points. Here are the main updates: E-Visa Expansion: Indonesia has expanded its e-visa program to cover more countries. Travelers can now apply online for a tourist, business, or social visit visa without visiting an embassy. Visa-Free Entry: Citizens of certain countries are still eligible for visa-free entry for short visits, usually up to 30 days. However, the list of visa-free countries has been slightly adjusted, so it’s important to check if your nationality still qualifies. Visa on Arrival (VOA): Indonesia continues to offer Visa on Arrival for many countries, allowing travelers to obtain a visa at select airports and seaports. The VOA is typically valid for 30 days and can be extended once for another 30 days. Longer Stay Options: New visa types, like the Second Home Visa, allow longer stays for travelers interested in living or investing in Indonesia for an extended period. These changes are part of Indonesia’s effort to attract more tourists and business travelers while maintaining clear entry processes. Can Tourists Extend Their Visa in Indonesia? Yes, tourists can extend their visa while in Indonesia, depending on the type of visa they hold. According to the Indonesia visa regulations, if you entered Indonesia with a Visa on Arrival, you can apply for an extension to stay for an additional 30 days, giving you a total of 60 days in the country. Here’s how the extension process typically works: Apply Before Expiry: You must apply for your extension at least a few days before your visa expires to avoid overstaying penalties. Visit Immigration Office: You’ll need to visit a local immigration office in Indonesia to submit your extension request. Documents Needed: Usually, you’ll need your original passport, a copy of your current visa, and a completed application form. Processing Time: It can take anywhere from 3 to 7 business days to process the extension, depending on the office and location. If you’re planning to stay longer than 60 days, you should consider applying for a different type of visa, such as a social or business visa, which can offer longer validity periods. At Fluxir, we can help you understand your options and handle your visa extension smoothly so you can focus on enjoying your Indonesian adventure. What Nationalities Need a Visa for Indonesia? While many travelers can visit Indonesia without a visa or with a Visa on Arrival, not everyone is eligible. Understanding who needs a visa based on the Indonesia visa regulations can save you a lot of stress before your trip. Visa-Free Entry: Citizens of countries like Singapore, Malaysia, Thailand, Vietnam, and a few others can enter Indonesia without a visa for short stays (up to 30 days). This type of entry cannot be extended. Visa on Arrival: Travelers from countries such as the United Arab Emirates, Australia, the United States, and most European countries can apply for a Visa on Arrival, valid for 30 days and extendable once. E-Visa Requirement: Some nationalities must apply for an e-visa before traveling, regardless of their purpose of visit. This includes countries not listed under visa-free or VOA programs. Full Visa Application: Nationals from certain countries must go through a full visa application process at an Indonesian embassy or consulate before traveling. They cannot apply online or obtain a VOA. It’s crucial to check the latest Indonesia visa regulations specific to your nationality before booking your flight. And remember, at Fluxir, we offer personalized visa services to ensure you meet all the necessary requirements without any hassle. Why Staying Updated on Indonesia Visa Regulations Matters Indonesia updates its visa policies from time to time based on global events, tourism strategies, and bilateral relations with other countries. Staying informed about the Indonesia visa regulations helps you: Avoid issues at immigration checkpoints Ensure you have the correct documents ready Plan your trip better, especially if you want to extend your stay Save time and money by avoiding fines or unexpected travel interruptions Partnering with a trusted travel and visa service provider like Fluxir ensures that you always have the latest information and support at your fingertips. Plan Your Trip the Right Way: Get Expert Help with Indonesia Visa Regulations Ready to explore the wonders of Indonesia? Don’t let visa worries hold you back. At Fluxir, we specialize in helping travelers like you understand and meet all Indonesia visa regulations easily and quickly. Whether you need a new visa, an extension, or just the latest travel advice, our team is here to support you. Visit Fluxir today and let’s get your Indonesian journey started the right way.

indonesia visa for uae residents
e-Visa, Dubai, Indonesian, Obtaining a Visa, Visas

Do UAE residents need visa for Indonesia?

  If you’re a resident of the UAE and planning to visit Indonesia, you might be wondering whether you need a visa or not. The short answer is: Yes, UAE residents must have a valid visa before entering Indonesia for tourism, business, or other purposes. Luckily, Indonesia offers a convenient e-visa system that simplifies the visa application process for travelers. With the Indonesia visa for UAE residents online, you can easily apply online and avoid the traditional, time-consuming embassy visits. In this article, we will take a closer look at everything you need to know about the Indonesia visa for UAE residents, including how to apply, the documents required, and why the e-visa is a great option for travelers from the UAE. What is the Indonesia Visa for UAE Residents? The Indonesia visa for UAE residents is an official travel document that allows you to enter Indonesia for tourism, business, or other purposes. While UAE residents cannot travel to Indonesia without a visa, the process of obtaining one has become much easier thanks to the introduction of the Indonesia e-visa. The e-visa eliminates the need for visiting the embassy and dealing with long queues. Instead, you can complete the application process entirely online, making it a more convenient option for travelers from the UAE. Whether you’re planning to explore Indonesia’s stunning beaches, conduct business, or visit family, the e-visa system is designed to make your journey smooth and hassle-free. How to Apply for the Indonesia e-Visa for UAE Residents Applying for an Indonesia visa for UAE residents has never been easier. With the e-visa system, you can apply from the comfort of your home or office, avoiding unnecessary paperwork and embassy visits. Here’s how you can apply for an Indonesia e-visa: Gather all Required Documents Before you start the online application, make sure you have the necessary documents. Typically, you will need: A valid passport that remains valid for at least six months from your arrival date in Indonesia A recent passport-size photo Proof of travel plans (flight booking, accommodation details, etc.) Proof of sufficient funds to support your stay in Indonesia (if required) A valid email address to receive your e-visa Complete the Online Application Form Visit the official Indonesia e-visa website or use a trusted service like Fluxir to complete the application form. You will need to fill in personal information, travel details, and upload your documents. The form is straightforward, but ensure that all information matches your passport exactly to avoid any issues. Pay the Visa Fee Once you’ve filled out the form and uploaded the necessary documents, you’ll need to pay the visa fee. The payment is done online using a credit card or other secure payment methods. Keep a copy of the payment receipt for your records. Wait for Approval After submitting your application and making the payment, the processing time typically takes around 3 – 5 business days. During this period, your application will be reviewed, and you will receive an email notification once your visa is approved. Receive Your e-Visa Once your visa is approved, you will receive your Indonesia visa for UAE residents via email. Print a copy of the e-visa and carry it with you when you travel to Indonesia. The e-visa will be electronically linked to your passport, and you’ll show it to immigration officers upon arrival. Benefits of the Indonesia e-Visa for UAE Residents The Indonesia e-visa for UAE residents offers several advantages compared to the traditional visa process: Convenience: You can apply for the e-visa from anywhere, at any time, as long as you have an internet connection. No Embassy Visit: Say goodbye to long waits and unnecessary trips to the embassy. The entire process is online. Faster Processing: The e-visa system speeds up the approval process, allowing you to receive your visa within a few days. Transparency: You can track the status of your visa application online and receive timely updates via email. By using the e-visa system, you save both time and effort while ensuring a smooth visa process for your trip to Indonesia. Is Visa on Arrival Still Available for UAE Residents? In addition to the e-visa, Indonesia also offers a Visa on Arrival (VOA) for citizens of many countries, including UAE residents. However, the Indonesia visa for UAE residents online is generally preferred for a few key reasons: Avoid Long Waits: With the VOA, you might have to wait in line at the airport, especially during peak travel seasons. The e-visa lets you skip this step. Guaranteed Approval: With the e-visa, your visa is pre-approved before you arrive in Indonesia. This reduces the risk of being turned away upon arrival. No Cash Required: You won’t need to carry cash to pay for the visa fee on arrival, as it’s already paid online. While the VOA is still available, applying for the e-visa ahead of time offers more peace of mind and a smoother travel experience. Who Can Apply for the Indonesia e-Visa? The Indonesia visa for UAE residents online is available to travelers holding a valid UAE residence permit. It is also available to UAE citizens, as well as residents from other countries, depending on the eligibility criteria. If you’re a resident of the UAE, you can apply for the e-visa if your passport meets the validity requirements. Be sure to check the eligibility criteria before applying to avoid any surprises. Common Issues with the Indonesia e-Visa and How to Avoid Them While the e-visa process is designed to be simple, some travelers may encounter a few issues. Here are some common problems and how to avoid them: Incorrect Information: Always double-check your application details before submitting. Even small errors in your name or passport number can cause delays or rejections. Invalid Documents: Ensure that your documents are clear and meet the requirements. Low-quality or blurry images may result in your application being rejected. Payment Issues: Make sure that the payment for the visa is successfully processed before proceeding to avoid delays. If

apply for sri lanka visa online
e-Visa, Obtaining a Visa, Sri Lanka

Can I apply for Sri Lanka visa online?

Sri Lanka is a beautiful destination with lush landscapes, rich culture, and warm beaches, attracting travelers from around the world. If you’re planning a trip to this island paradise, you’ll be happy to know that applying for a Sri Lanka visa has become much easier thanks to the online system. In this article, we’ll explain how to apply for Sri Lanka visa online, the benefits of the process, and what to do if you need to extend your visa. What is an Electronic Travel Authorization (ETA) for Sri Lanka? If you’re looking to visit Sri Lanka, the first thing you need is an Electronic Travel Authorization (ETA). This is an official travel document that allows you to enter Sri Lanka. The best part is that you can apply for Sri Lanka visa online from the comfort of your own home! The online application process is quick and simple, and the approval comes in as little as 24 hours, depending on the type of visa you are applying for. Why You Should Apply for Sri Lanka Visa Online Gone are the days when you had to visit a consulate or embassy to get your visa. Now, you can apply for Sri Lanka visa online, making the entire process more efficient. Here are some benefits of applying for your Sri Lanka visa through the online system: Convenience: You can submit your application anytime and from anywhere in the world, as long as you have an internet connection. Speed: You will receive your approval notice within 24 hours. This is much faster than waiting for a visa to be processed through traditional channels. Reduced Hassle: The online application is straightforward, and you don’t need to visit any government office in person. Cost-Effective: The online ETA is affordable compared to other visa processing methods. How to Apply for Sri Lanka Visa Online Applying for a Sri Lanka visa online is an easy process. Here’s a step-by-step guide on how to apply for your ETA: Visit the Official ETA Website Go to the official Sri Lanka ETA website. Make sure you’re on the official government site to avoid scams and unnecessary fees. Fill Out the Application Form Once you’re on the website, you’ll be asked to fill out an online application form. Provide accurate details, including your personal information, passport details, and travel dates. The information required is straightforward and should take only a few minutes to complete. Submit Your Passport Details You’ll need to upload a scanned copy of your passport. Make sure the scan is clear and legible, as the authorities will use this to verify your identity. Paying the Visa Fee After filling out your details, you’ll need to pay the visa fee. The payment is made online through a secure payment gateway. The cost of the visa depends on the type of visa you are applying for and your nationality. Typically, it is an affordable process. Receive Your Approval After submitting your application and payment, you should receive your approval notice within 24 hours. This approval notice is what you’ll use to enter Sri Lanka. Print Your ETA Approval Once approved, print your ETA approval notice. You’ll need to show it at the airport upon arrival in Sri Lanka. Types of Visas Available for Online Application The most common type of visa that you can apply for Sri Lanka visa online is the Tourist ETA; However, there are other types of visas available, depending on your purpose of travel: Tourist Visa: This is the most common visa for travelers planning a short visit to Sri Lanka for tourism purposes. The Tourist ETA typically allows a stay of 30 days. Business Visa: If you’re visiting Sri Lanka for business meetings, conferences, or other professional purposes, you can apply for a business ETA. Transit Visa: If you’re just passing through Sri Lanka on your way to another destination, a transit ETA might be appropriate. How Long Does it Take to Get the Sri Lanka Visa Approval? Once you apply for Sri Lanka visa online, the approval is usually issued within 24 hours. However, it’s recommended that you apply for the visa at least a few days before your planned departure to avoid any last-minute issues. Can You Extend Your Sri Lanka Visa? If you find that you need more time in Sri Lanka, you can request an extension for your visa. Extensions are typically processed through the Sri Lanka Immigration and Emigration Department, and you may be asked to provide additional documents to support your extension request. It’s best to apply for an extension well before your original visa expires to avoid overstaying and any penalties. Tips When Applying for a Sri Lanka Visa Online Important Things to Remember When Applying for a Sri Lanka Visa Online: Eligibility: Not all nationalities are eligible to apply for the ETA. Check the eligibility list on the official website before you apply. Valid Passport: Your passport must be valid for at least six months beyond your planned departure date from Sri Lanka. Accurate Information: Make sure the details you provide in the application are accurate. Incorrect information may lead to a delay in processing or even a denial of your visa. Multiple Entries: If you plan to leave and re-enter Sri Lanka during your trip, you may need to apply for a multiple-entry visa. Should You Apply for Sri Lanka Visa Online? The ability to apply for Sri Lanka visa online is a game-changer for travelers. Not only does it save you time, but it also makes the process much easier and more convenient. With quick processing and approval, you can focus on preparing for your trip to Sri Lanka rather than worrying about paperwork. Just remember to apply a few days in advance and ensure all the information you provide is correct. If you are planning to extend your stay, make sure to contact the Immigration and Emigration department well before your visa expires. The online visa system has simplified international travel to Sri

how to know if spain visa is approved
e-Visa, Obtaining a Visa, Spain, spanish, Visas

How to Know if Spain Visa is Approved ?

  Applying for a Spain visa is an exciting step towards experiencing the beauty, culture, and adventure Spain has to offer. But after submitting your application, the waiting period can feel endless. You might be wondering how to know if Spain visa is approved without stressing too much. In this guide, we at Fluxir will walk you through everything you need to know about how to know if your Spain visa is approved. Let’s get started. Why Knowing Your Spain Visa Status Matters Before we dive into the ways to track your application, let’s quickly understand why it’s important to check your visa status. Knowing how to know if Spain visa is approved helps you plan your trip efficiently. It saves you from last-minute stress, missed flights, or non-refundable bookings. It also gives you peace of mind during a process that can sometimes feel overwhelming. how to know if spain visa is approved There are a few simple and effective ways to check the status of your Spain visa application. The most reliable Ways to check if your Spain Visa is Approvedو include: In-Person Visits to the Application Centre One of the most straightforward ways on how to know if Spain visa is approved is by visiting the visa application centre where you submitted your documents. Most Spain visa centres have a customer service desk where you can inquire about your visa status. When visiting in person, make sure you bring a copy of your receipt or application number. The staff can give you a real-time update or guide you on the next steps if a decision has been made. Advantages: Quick answers Face-to-face interaction Immediate guidance if further documents are needed Contacting the Spanish Embassy or Consulates If visiting in person is not convenient or you need more detailed information, another way on how to know if Spain visa is approved is by directly contacting the Spanish Embassy or Consulates. You can call, email, or even book an appointment. When contacting them, provide your application reference number and full name. Be polite and clear with your request. They can check the system and inform you about the status of your application. Advantages: Reliable and official information Answers from the source directly handling your visa Online Tracking Systems Most Spanish visa application centres offer online tracking services. When you submit your application, you usually receive a tracking number. You can visit the website of the visa centre and enter your tracking number to check updates. This is one of the easiest and fastest ways for how to know if Spain visa is approved without leaving your home. Advantages: 24/7 access Instant status updates No need to wait in queues or on hold Email and SMS Notifications Sometimes, when you submit your visa application, you can opt in for email or SMS updates. If you choose this option, you’ll receive notifications at every stage of the process: when your application is received, when it is being processed, and finally when a decision is made. Checking your emails and SMS regularly is another great method for how to know if Spain visa is approved quickly and conveniently. Advantages: Immediate notification No manual checking required Easy to archive or save for future reference Understanding Visa Status Updates When you receive an update, it might not always say “approved” or “denied” right away. Here are some common terms and what they mean: Under Process: Your application is still being reviewed. Ready for Collection: A decision has been made; you need to collect your passport. Dispatched: Your passport has been sent to the address you provided. Approved/Granted: Congratulations! Your Spain visa is approved. Rejected: Unfortunately, your visa was not approved. You can usually appeal or reapply. Knowing how to read these status updates is an important part of how to know if Spain visa is approved. How Long Does It Take to Get a Spain Visa Approved? Normally, it takes around 15 calendar days from the date your application is submitted to get a decision. However, it can vary depending on the season, your application type, or additional documents requested. While you’re waiting, checking regularly using the methods we shared helps you stay informed without feeling anxious. What to Do If Your Spain Visa is Approved If you find out that your Spain visa is approved, congratulations! Here are your next steps: Collect your passport or wait for delivery Double-check the visa details (name, dates, number of entries) Book your flights and accommodations Prepare your travel itinerary Pack your bags and enjoy your trip! Finding out how to know if Spain visa is approved is only the beginning. Once you have your visa, exciting adventures in Spain await you What to Do If Your Spain Visa is Not Approved If your visa is rejected, don’t lose hope. Carefully read the reason for rejection (usually provided in writing), and you can: Appeal the decision if allowed Correct any mistakes and reapply Consult experts like Fluxir to help you prepare a stronger application At Fluxir, we specialize in helping travelers like you successfully navigate the visa process from start to finish. Get Expert Help With Your Spain Visa Today Planning your dream trip to Spain? Let Fluxir make it easy for you. Our experienced team offers full support for your Spain visa application, including helping you track your visa status so you’ll always know exactly how to know if Spain visa is approved. Contact us today at Fluxir and let’s turn your Spain travel dreams into reality without the stress.

indonesia visa online
Indonesian, e-Visa, Obtaining a Visa, Visas

Can You Apply for an Indonesia Visa Online?

  If you’re planning a trip to Indonesia, one of the first things you’ll need to figure out is your visa. Thanks to modern technology, getting an Indonesia visa online has become easier than ever. Whether you’re traveling for tourism, business, or family visits, applying for your visa electronically saves time, stress, and paperwork. At Fluxir, we specialize in making your visa process smooth and simple. In this article, we’ll guide you through everything you need to know about applying for an Indonesian visa online, especially if you’re applying from Gulf countries like the UAE, Saudi Arabia, Qatar, Kuwait, Oman, or Bahrain. Can I Apply for an Indonesian Visa Online? Yes, you can absolutely apply for an Indonesia visa online. Indonesia introduced an eVisa system to make travel easier for visitors from many countries, including the Gulf region. The online visa, also called an electronic visa or eVisa, allows travelers to apply without visiting an embassy or consulate. The entire process can be done from your laptop, tablet, or even your smartphone. For travelers from Gulf countries, applying for an Indonesian visa online is not just possible, it’s highly recommended because it’s fast, convenient, and avoids any unnecessary delays at immigration checkpoints. Applying for an Indonesia Visa Online from Gulf Countries If you are a citizen or resident of a Gulf country, getting your Indonesia visa online is a straightforward process. Indonesia’s immigration department has made special arrangements to ensure that travelers from the Middle East and Gulf regions can complete their visa applications without hassle. Here’s what you generally need: A passport valid for at least six months from the date of arrival A recent passport-size photo Travel details, including your flight ticket and accommodation Proof of financial means, if required A valid email address is required to receive your eVisa You simply upload these documents, fill out the application form online, pay the visa fee electronically, and wait for the approval, which usually arrives by email. At Fluxir, we can help you manage this entire process so you can relax and focus on planning your trip. What’s the Process for eVisa for Indonesia? Understanding the step-by-step process for getting your Indonesian visa online is important to avoid any mistakes. Here’s how it typically works: Step 1: Prepare Your Documents Before starting the application, make sure you have scanned copies of all necessary documents. Clear and readable documents are essential to avoid delays. Step 2: Fill Out the Application Form Visit the official Indonesia eVisa portal or work with a trusted service like Fluxir to fill out your online form. Make sure all the information matches your passport exactly. Step 3: Pay the Visa Fee Payment is usually done online using a credit or debit card. Make sure you get a receipt or confirmation of payment. Step 4: Receive Your eVisa by Email Once approved, your Indonesia visa online will be sent to your registered email address. Print it out and carry it with you when you travel. Step 5: Present Your eVisa on Arrival When you arrive in Indonesia, show your printed eVisa at the immigration counter along with your passport. Following this simple process ensures that your travel experience to Indonesia starts without any complications. Is a Visa on Arrival Still Available? Yes, Indonesia still offers a Visa on Arrival (VOA) for citizens of many countries, including Gulf countries. However, many travelers prefer to get their Indonesia visa online before traveling. Here’s why applying online is better: You skip long queues at the airport You avoid carrying cash to pay visa fees on arrival You travel with confidence, knowing your entry is pre-approved The Visa on Arrival system can sometimes cause delays during busy travel seasons. That’s why securing your Indonesian visa online before your journey is the smarter and more convenient choice. Benefits of Applying for an Indonesia Visa Online Choosing to apply for your Indonesia visa online brings many advantages: Apply from anywhere at any time. Most applications are processed within a few business days. You can track your visa status easily online. Helping you avoid surprises or refusals upon arrival. When you choose Fluxir to assist with your visa application, you get expert support every step of the way. How Fluxir Helps You Get Your Indonesian Visa Online We specialize in visa and travel services designed for Gulf country residents, and here’s what we offer: Complete management of your Indonesia visa online application Guidance on document preparation Assistance with payment and form submissions Fast communication and updates Friendly support from our experienced team Instead of worrying about technical issues or documentation errors, let Fluxir handle your application professionally and efficiently. Apply for Your Indonesian Visa Online with Ease Today! Planning your Indonesian adventure starts with getting your visa ready — and at Fluxir, we’re here to make it effortless for you. Skip the stress and the confusion. Let our team handle your Indonesian visa online application from start to finish, so you can focus on enjoying your trip. Contact us at Fluxir today and take the first step towards your unforgettable journey to Indonesia.

digital nomad visa
e-Visa, Obtaining a Visa, Visas

Digital Nomad Visa Guide 2025: Where to Go, How to Apply, and Everything You Need to Know

  The digital nomad lifestyle has been growing rapidly in recent years, and by 2025, it’s clearer than ever that this way of working is here to stay. Whether you want to work from a beach in Bali, a café in Lisbon, or a co-working space in Dubai, the idea of living and working from anywhere is now more accessible than ever, thanks in part to the growing popularity of the digital nomad visa. What is the Digital Nomad Lifestyle? In simple terms, a digital nomad is someone who can work remotely from anywhere in the world, as long as they have an internet connection. These individuals often choose to live in different countries, moving around frequently, while keeping their jobs or businesses running online. The digital nomad lifestyle has gained significant popularity in recent years. By 2025, more companies and workers are embracing remote work, and many countries are adapting by offering digital nomad visas to cater to this growing trend. It’s a win-win; remote workers get to experience new cultures and environments, while countries benefit from the economic contributions of these visitors. At Fluxir, we make applying for this visa easy and hassle-free. You can browse different visa options, compare requirements, and submit your application all from one platform. Who is a Digital Nomad? A digital nomad is someone who works remotely, typically in a freelance, contract, or business owner capacity, and chooses to live and work in different countries instead of staying in one location. Here are some key characteristics that define a digital nomad: Remote Work: Digital nomads usually work in tech, marketing, design, writing, consulting, or other online professions that don’t require a physical office. Frequent Travel: Unlike traditional employees, digital nomads move between countries and cities, often staying in one place for a few months before moving on. Independent Lifestyle: Most digital nomads are freelancers or entrepreneurs, giving them the freedom to set their schedules and work from wherever they choose. Digital nomads are often confused with remote workers, freelancers, or expats, but the key difference is in the lifestyle. While remote workers and freelancers may stay in one location for a long time, digital nomads prefer the flexibility to travel and work from different places regularly. What Is a Digital Nomad Visa? It is a special visa offered by certain countries to remote workers who want to live in that country while working for an employer or running a business abroad. Unlike traditional tourist visas, digital nomad visas are specifically designed for individuals who plan to stay longer than a typical tourist visit but need to work remotely while living in that country. Why choose a visa for digital nomads? Stay Longer: Most tourist visas only allow you to stay for a limited period (usually 30-90 days). With a digital nomad, you can stay for much longer, often up to a year or more. Work Legally: While on a tourist visa, you’re not allowed to work. With this visa, you can legally work while staying in the country. Peace of Mind: Knowing that you have a legal right to live and work in a country for an extended period can help eliminate the stress of constantly renewing tourist visas or worrying about overstaying. Eligibility Criteria for a visa for digital nomad To qualify for this visa, you’ll need to meet certain criteria that can vary depending on the country. Some of the most common requirements include: Minimum Income Many countries require digital nomads to prove they earn a minimum income each month or year. This is to ensure that you can financially support yourself while living in the country without relying on local resources. Type of Employment: Some countries may require you to show proof that you’re employed remotely, either as a freelancer, independent contractor, or employee of a foreign company. Age and Background Checks: Certain countries may have age limits (e.g., you must be over 18), and many will require a clean criminal background check. Top Countries Offering Digital Nomad Visas in 2025 Several countries now offer visas for digital nomads, each with different perks and benefits. Here are a few top destinations: Portugal: The Portugal’s visa for digital nomads allows remote workers to live and work in one of Europe’s most popular destinations. The visa can be valid for up to a year, and you can renew it for up to five years. The minimum income requirement is around €1,500 per month. Estonia Known for its e-residency program, Estonia offers a visa for digital nomads that allows you to live and work in the country for up to a year. The minimum income requirement is €3,504 per month. Costa Rica Costa Rica’s digital visa for nomads allows remote workers to live in the country for up to two years, with a minimum income requirement of $3,000 per month. UAE The UAE, and specifically Dubai, offers a digital nomad visa that allows you to work and live in the country for up to one year. The income requirement is a bit higher at $5,000 per month, but the lifestyle and amenities in Dubai are world-renowned. Other emerging destinations for digital nomads include countries like Bali, Mexico, and Croatia, where the demand for digital visas for nomads is growing rapidly. Digital Nomad Visa vs. Tourist Visa The biggest difference between a digital nomad visa and a tourist visa is the right to work. With a tourist visa, you’re only allowed to visit for a short period, and you cannot legally engage in any work or business activities. Working on a tourist visa can get you into legal trouble, especially if you’re caught earning income while staying in a foreign country without the appropriate visa. The visa for digital nomads gives you the legal right to work remotely while living in the country for an extended period, making it the smarter choice for remote workers in 2025. How to Apply for a Digital Nomad Visa Applying for a digital nomad visa can vary

sri lanka visa application
e-Visa, Obtaining a Visa, Sri Lanka, Visas

How submit sri lanka visa application from the Middle East ?

  Planning a getaway to Sri Lanka? Known for its breathtaking beaches, lush greenery, and rich cultural heritage, this tropical paradise attracts travelers from around the world. If you’re based in the Middle East and planning a short trip, you’ll need to complete a Sri Lanka visa application before you go. Thanks to the Electronic Travel Authorization (ETA) system, getting a visa for Sri Lanka is now easier than ever. In this guide, we’ll walk you through everything you need to know about applying for a Sri Lanka eVisa from the Middle East, from required documents to timelines and how Fluxir can help simplify the process. What Is the Sri Lanka eVisa (ETA)? The Electronic Travel Authorization (ETA) is an online visa system introduced by the Sri Lankan Department of Immigration and Emigration. It allows foreign nationals to apply for short-stay visas (like tourist, business, or transit) without visiting an embassy. For travelers from the Middle East, this means you can complete your Sri Lanka visa application online, receive approval within a few days, and enter the country with ease. The ETA is typically valid for 30 days with double entry allowed during that period. How to Apply for a Sri Lanka eVisa from the Middle East Here’s a simple step-by-step process to help you apply online for your Sri Lanka eVisa: Visit the Official ETA Website Start by accessing the official ETA website. This is where you’ll submit your Sri Lanka visa application electronically. Complete the Application Form Fill out the required fields in the sri lanka visa application including personal information, passport details, and travel plans. Make sure your information is accurate to avoid delays. Upload Required Documents You’ll need: A valid passport (with at least 6 months’ validity) A recent passport-size photo Details of your travel itinerary (flight and accommodation) Pay the Visa Fee The ETA application includes a small fee, which can be paid online via credit or debit card. Receive Confirmation Once your payment is processed, you’ll receive an email with your ETA reference. Visa approval usually takes 24 to 72 hours. Print Your ETA Approval Although it’s linked to your passport electronically, it’s best to carry a printed copy of your ETA when entering Sri Lanka. Who Needs a Sri Lanka eVisa? Most nationalities, including those from countries in the Middle East such as the UAE, Saudi Arabia, Qatar, Bahrain, Kuwait, and Oman, need to apply for an ETA before traveling to Sri Lanka, but the good news? is that the process is the same for all and entirely online. Documents Needed for a Tourist Visa? Before you can pack your bags and head to Sri Lanka, it’s important to make sure you have all the documents needed for a successful Sri Lanka visa application. Having the right paperwork ready will help you avoid delays or rejections during the application process. Here’s what you’ll typically need: A valid passport with at least six months remaining before expiration. A recent passport-sized photo with a plain background. Details of your travel itinerary, including flight bookings and hotel reservations. A valid email address to receive your Electronic Travel Authorization (ETA) approval. A credit or debit card for paying the visa application fee online. In some cases, proof of sufficient funds for the duration of your stay may be requested. These documents form the foundation of your application and ensure you’re ready for your Sri Lanka trip with no hiccups. How Long Does Visa Approval Take? One of the best things about the ETA system is how fast it works. Once you’ve submitted your Sri Lanka visa application, approval usually comes through quickly, especially if all your documents are in order. Here’s a look at the typical timeline: Standard ETA approvals usually take between 24 to 72 hours after submission. Rush processing is available through some visa service providers and may take less than 24 hours. In rare cases, if additional checks are needed, it may take up to 5 business days. To avoid any last-minute stress, it’s always a good idea to apply at least one week before your travel date. And if you’re applying through Fluxir, you’ll receive real-time updates and professional follow-up every step of the way. Can I Extend My Sri Lanka Visa? Yes, you can extend your visa once you’re in Sri Lanka. However, extensions must be applied for at the Department of Immigration in Colombo and are subject to approval. Tourist visas are typically extendable for up to 90 days. Common Mistakes to Avoid Submitting incorrect passport numbers or expiration dates Forgetting to print your ETA confirmation Applying too late before your travel date To avoid these issues, it’s best to start your Sri Lanka visa application well in advance of your departure date. How Fluxir Can Assist with your Sri Lanka visa application? Visa applications can be stressful, especially when you’re traveling internationally. That’s where Fluxir comes in. We help travelers from the Middle East apply for Sri Lanka visas quickly, correctly, and with peace of mind. Here’s how Fluxir can support you: Clear guidance through each step of the application Document check to ensure everything is complete Real-time updates so you’re always informed Support in both Arabic and English, if needed Error-free submissions that help avoid rejection Whether it’s your first time visiting Sri Lanka or your fifth, Fluxir is here to make your experience easier. Make Your Sri Lanka Travel Smooth with the Right Visa Completing your Sri Lanka visa application from the Middle East is easy, especially with the help of the ETA system. Just make sure you have your documents ready, apply online in advance, and double-check your information before submitting. With Fluxir by your side, you’ll have expert guidance at every step of the way, making your travel plans smooth and stress-free. Let Fluxir Help You Get to Sri Lanka with Ease Planning to visit Sri Lanka soon? Let Fluxir handle your visa application process from start to finish. We’ll ensure your documents are in

Scroll to Top